Introducing QR Codes for Calendars, Services & Rentals!
Sharing a calendar link should feel instant and effortless — and now it can.
We've introduced a new way to generate QR codes for Calendars, Services & Rentals. With this update, you can use any of the following as a dynamic QR code: a Calendar, a Service Calendar, or a Rental Calendar.
Whether you're promoting your services in-store, on a brochure, or via a digital invite, this makes it easier for customers to reach your booking page without the hassle of typing links.
What's new?
- Dynamic QR Codes for Calendar Links – Easily turn your calendar link into a dynamic QR code that redirects to the correct booking page.
- Create QR Codes in Minutes – Set up dynamic QR codes quickly and efficiently.
- Deeper Web Wisconsin's Connect CRM Integration – Seamlessly integrate calendars and services within Web Wisconsin's Connect CRM to boost bookings and engagement.
- Simplified Sharing – Use QR codes on printed materials, digital screens, or anywhere you want to promote your calendars and services.
Two ways to create QR codes for Calendars
Option 1: Create a QR code from the QR Codes app
Go to the QR Codes app and follow the steps below.
-
In the QR Codes app, click Create QR Code.
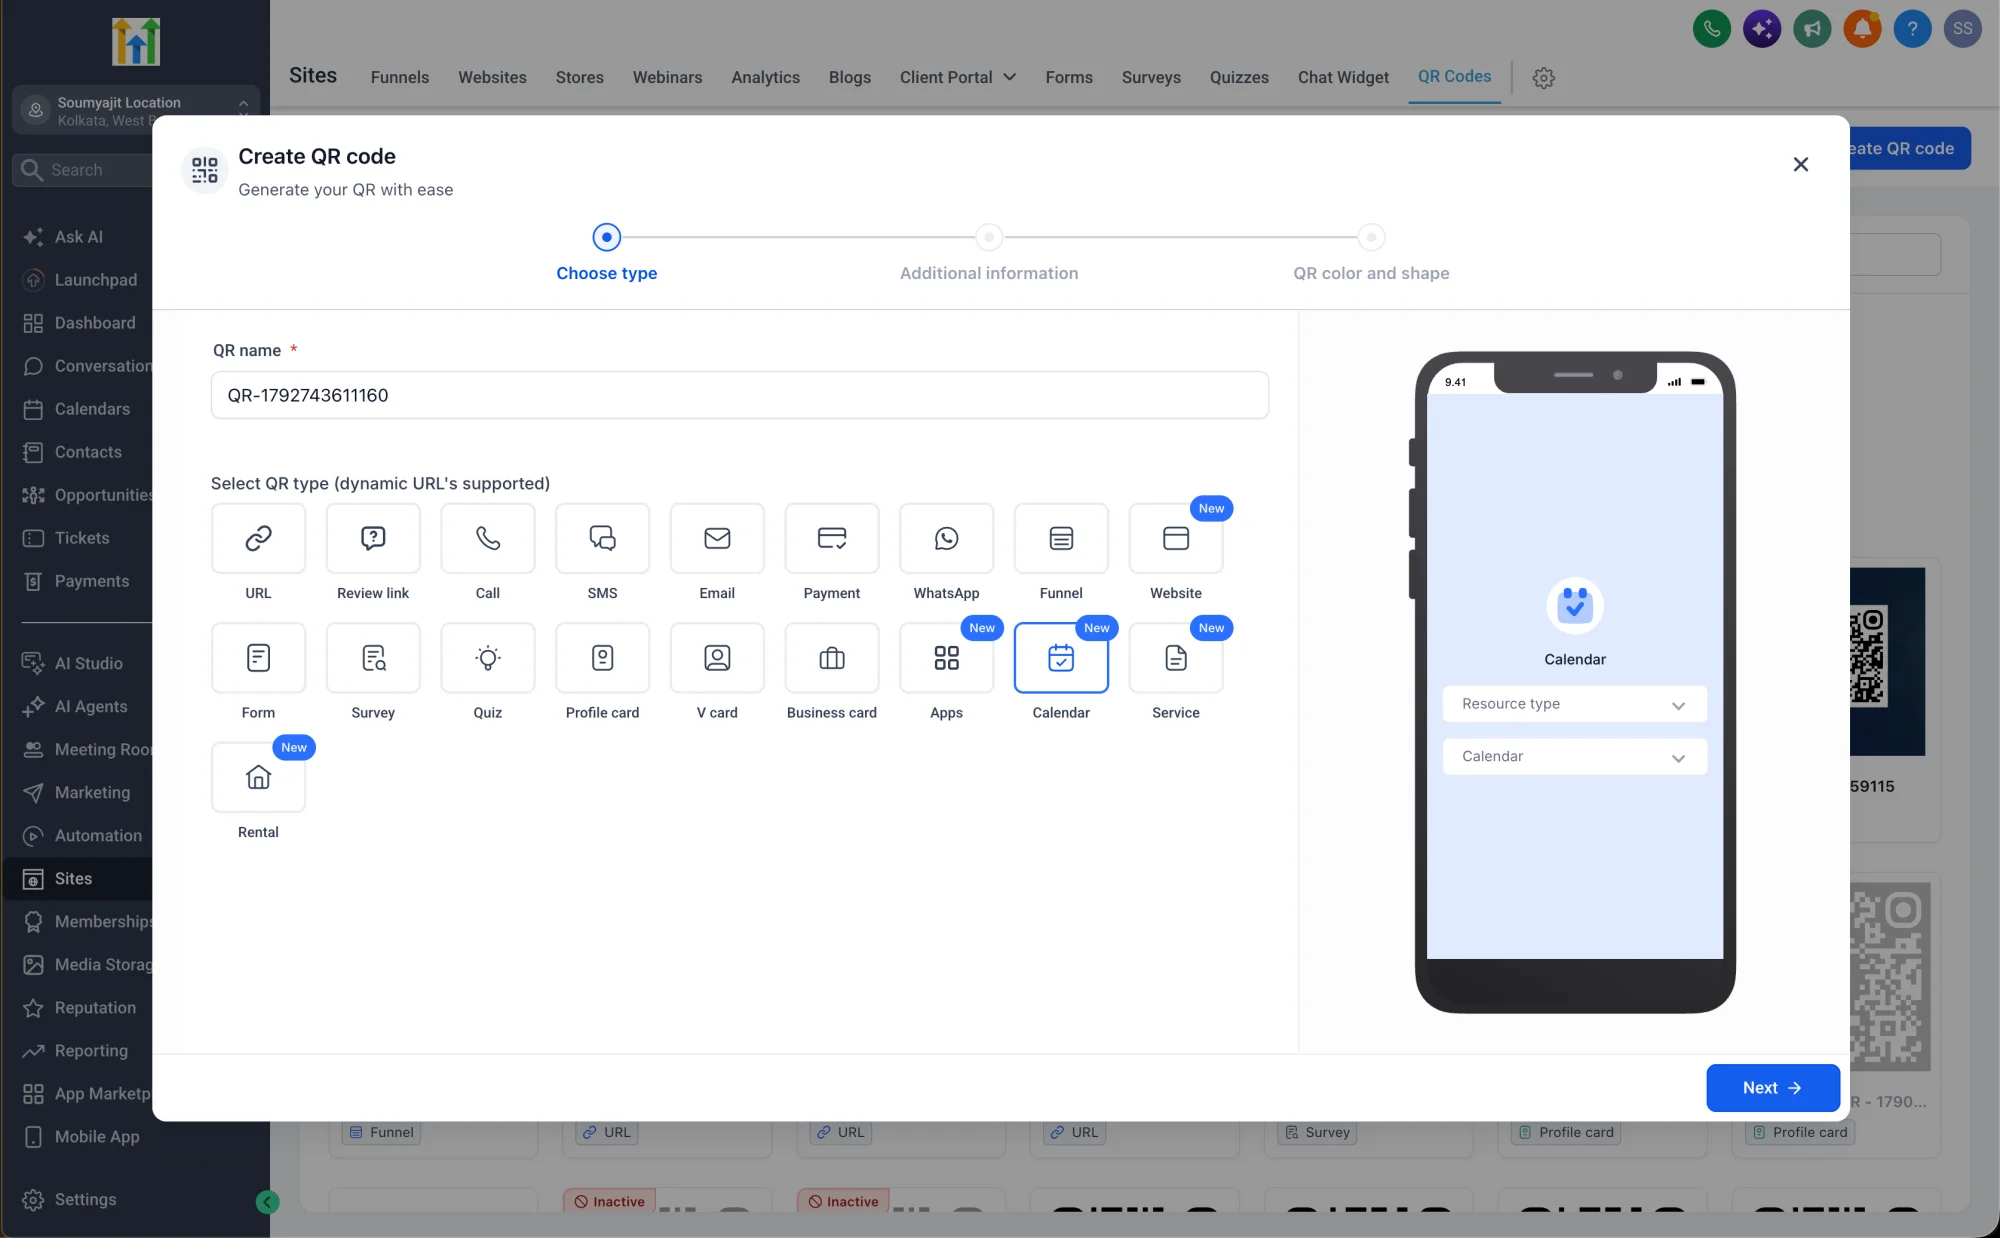 2. In the Type dropdown, select Website URL.
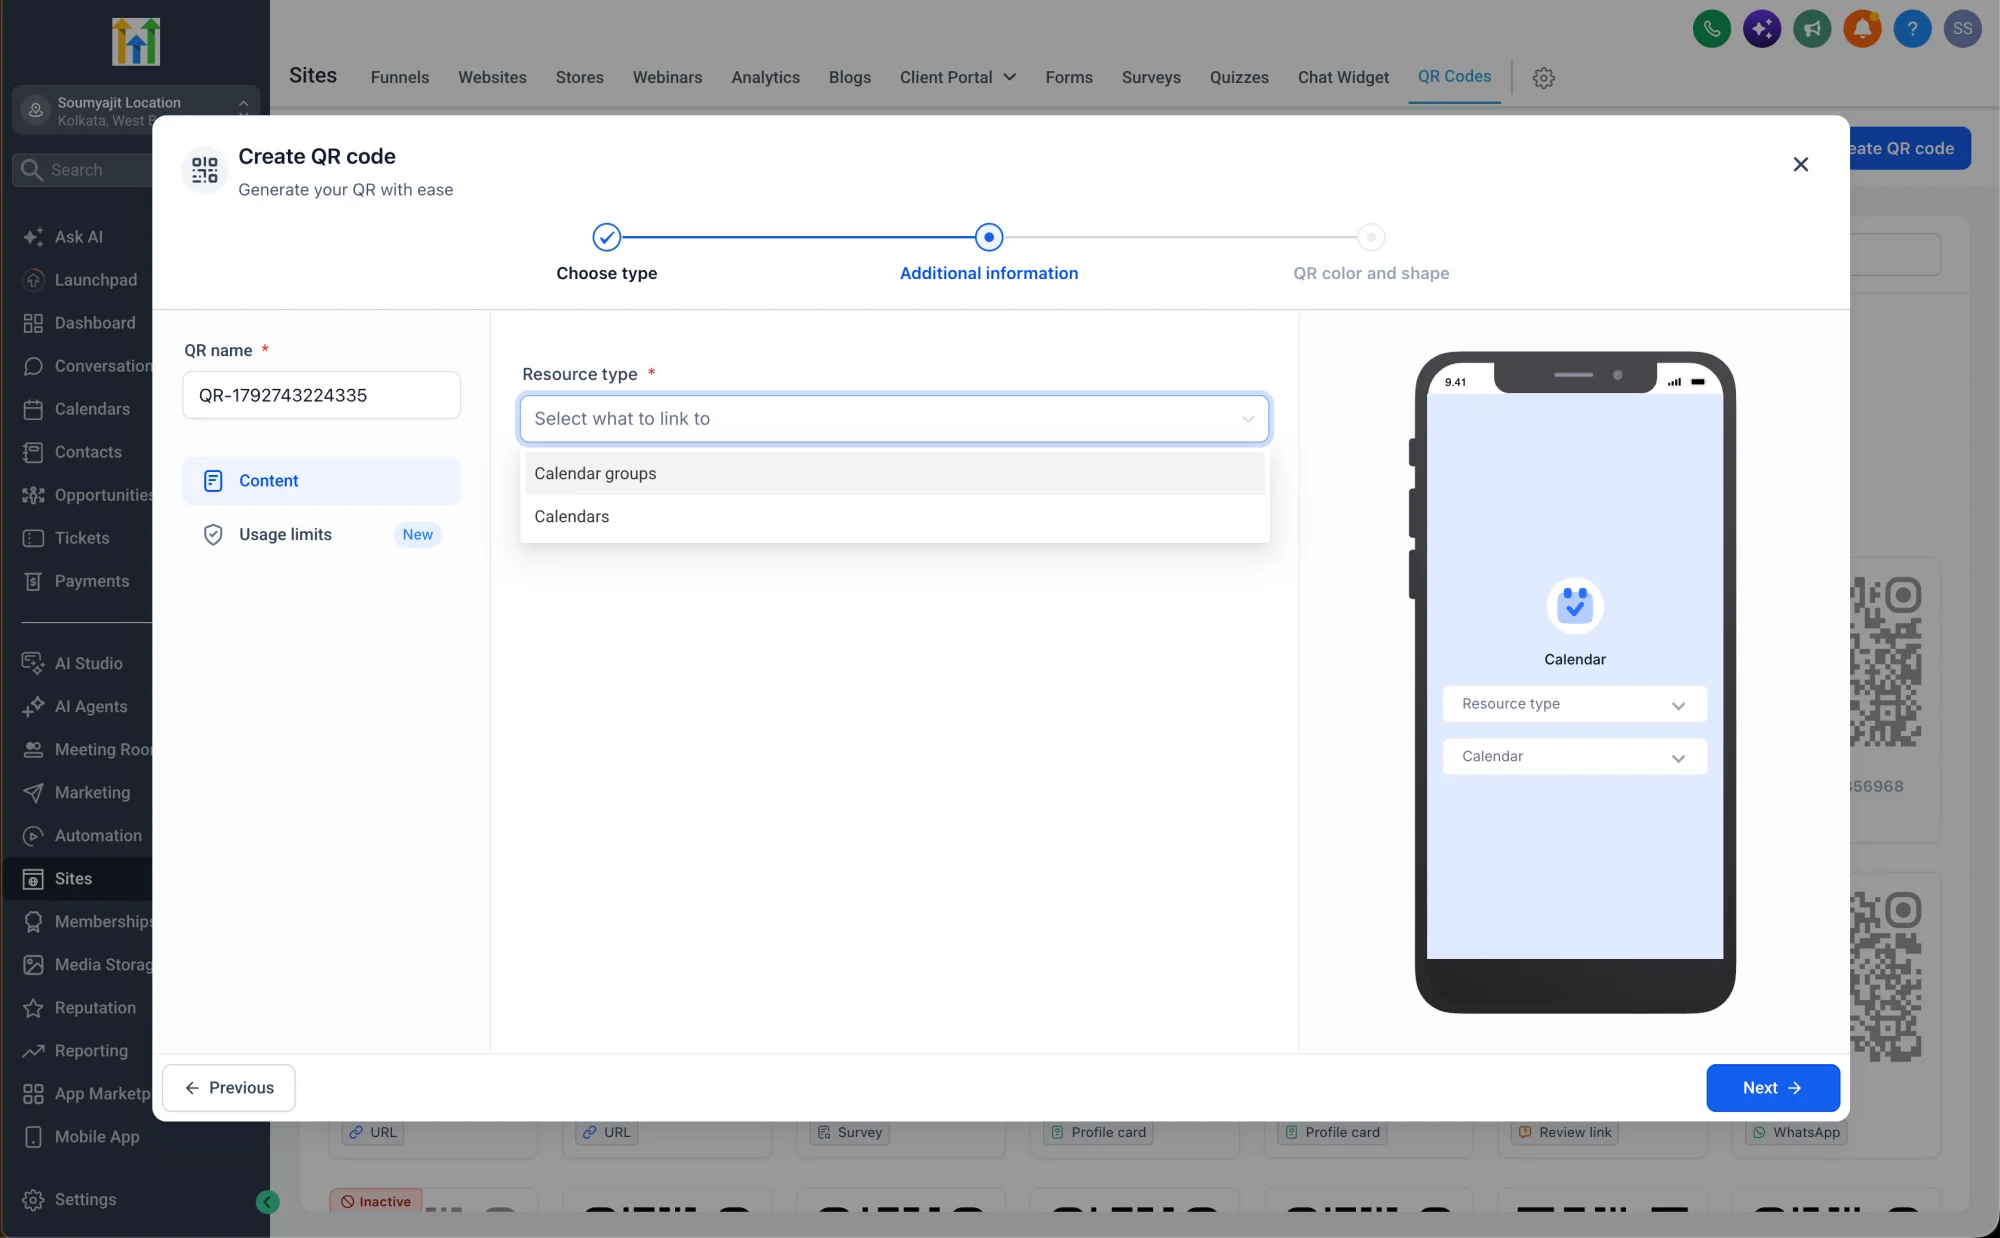
-
Click the "Select one" option to choose the Calendar, Service Calendar, or Rental Calendar of your choice.
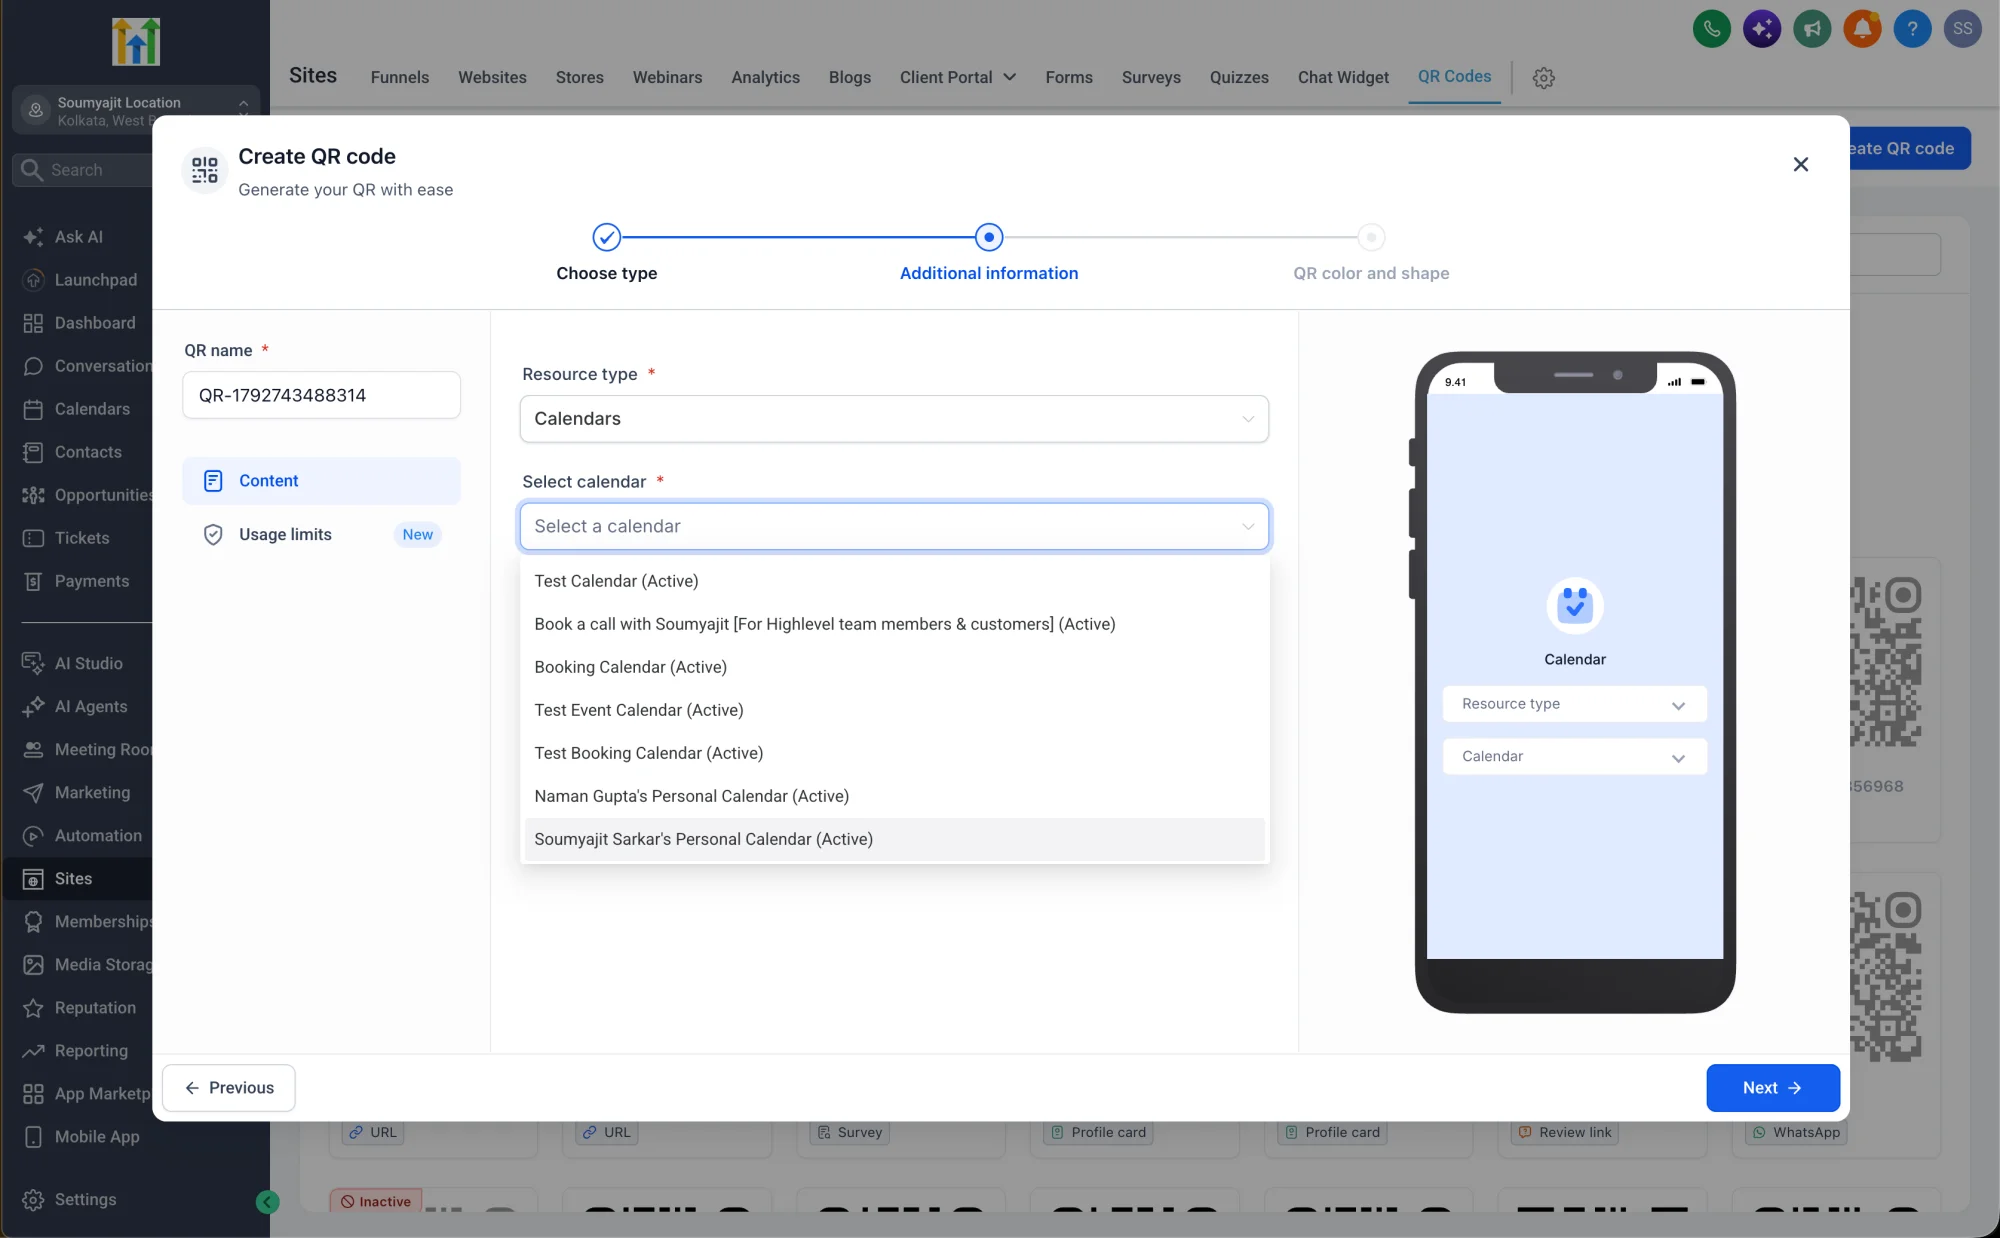
-
Once selected, you'll see the calendar's booking URL filled in automatically. Next, click the "Select one" option to choose a Brand Board or a color.
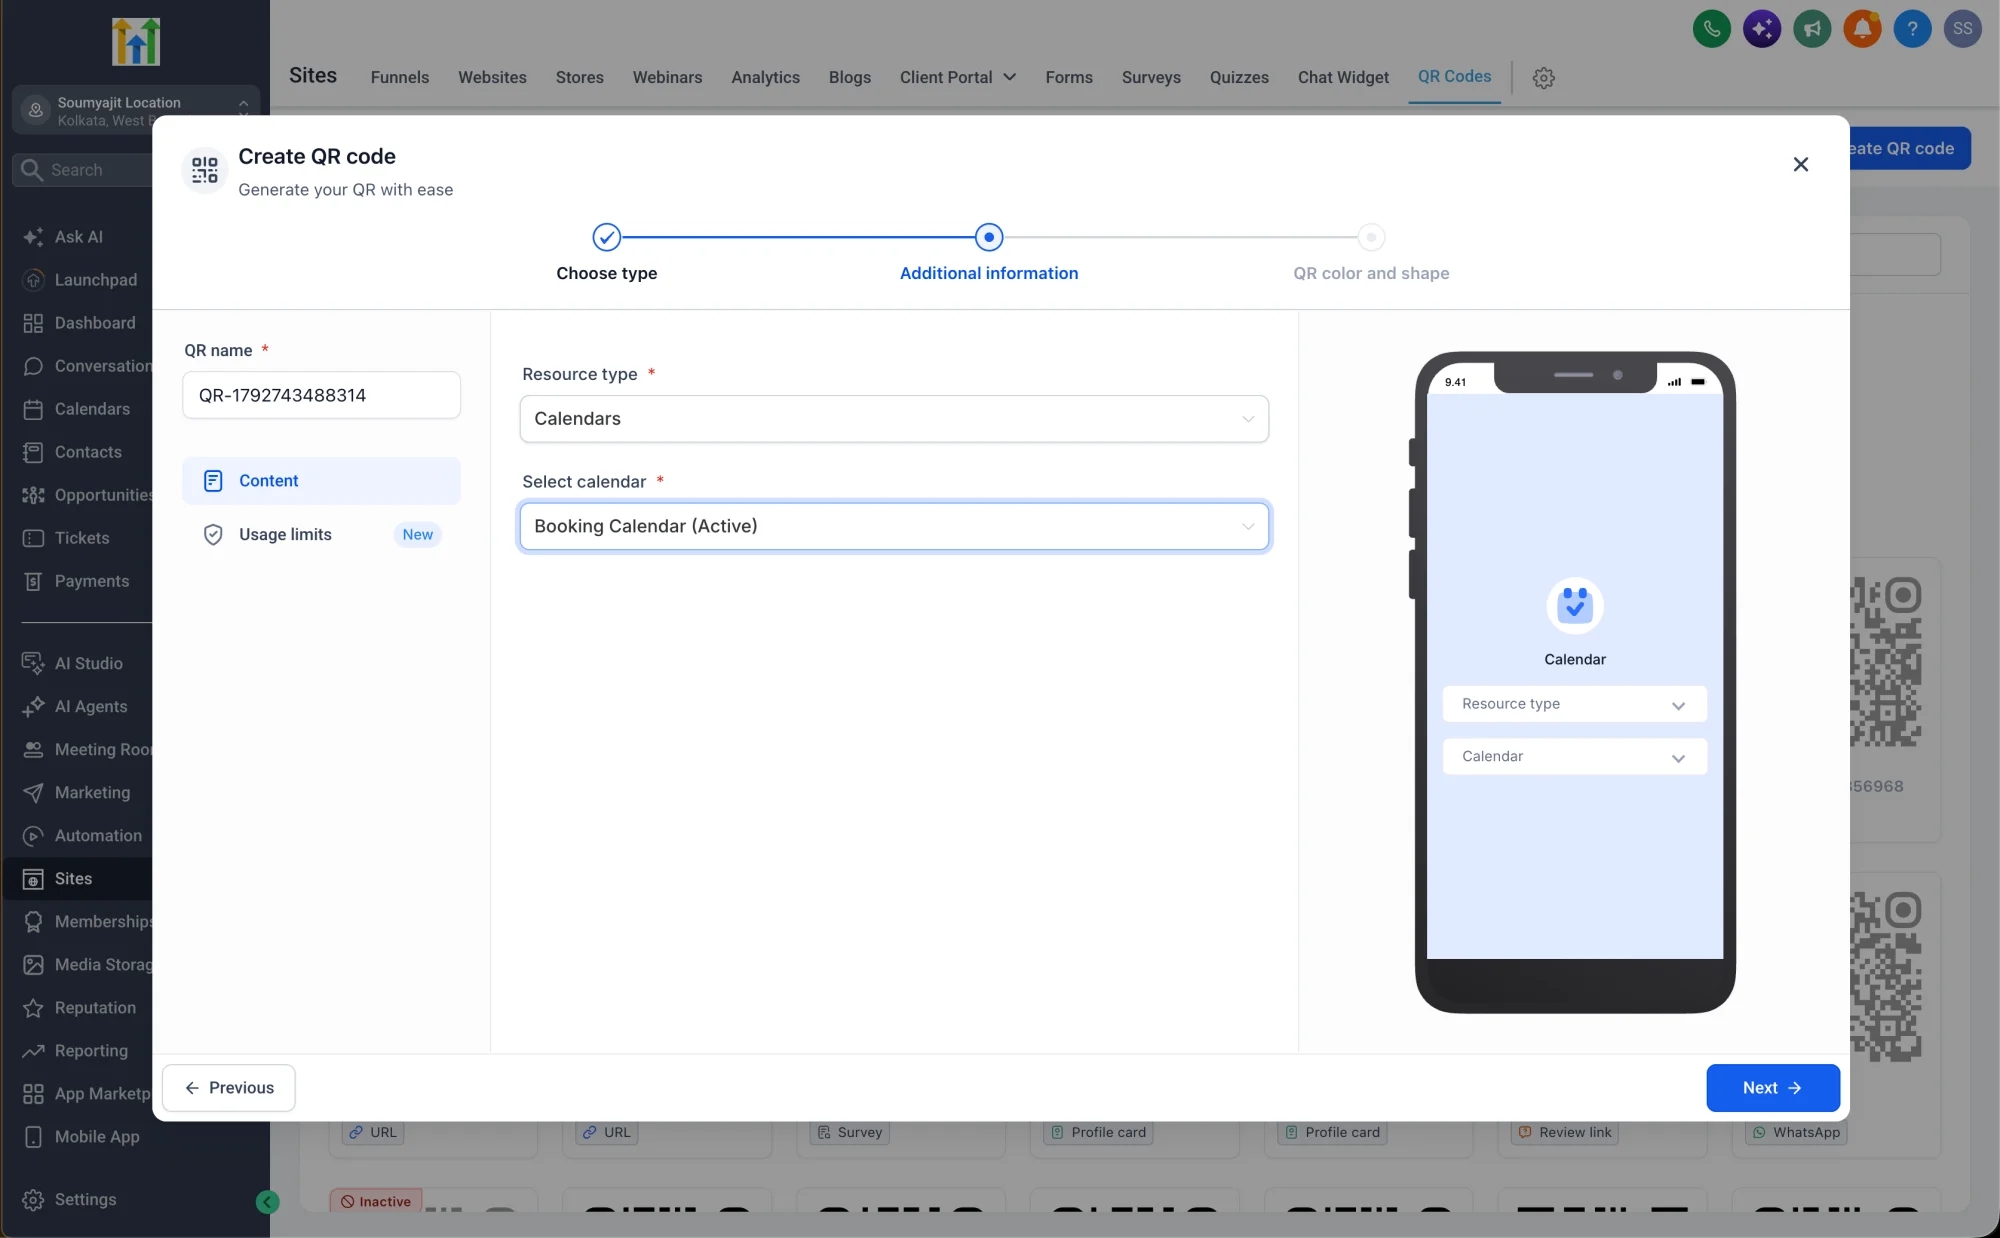 5. You can also select a specific color if you prefer, and proceed to Create QR Code.
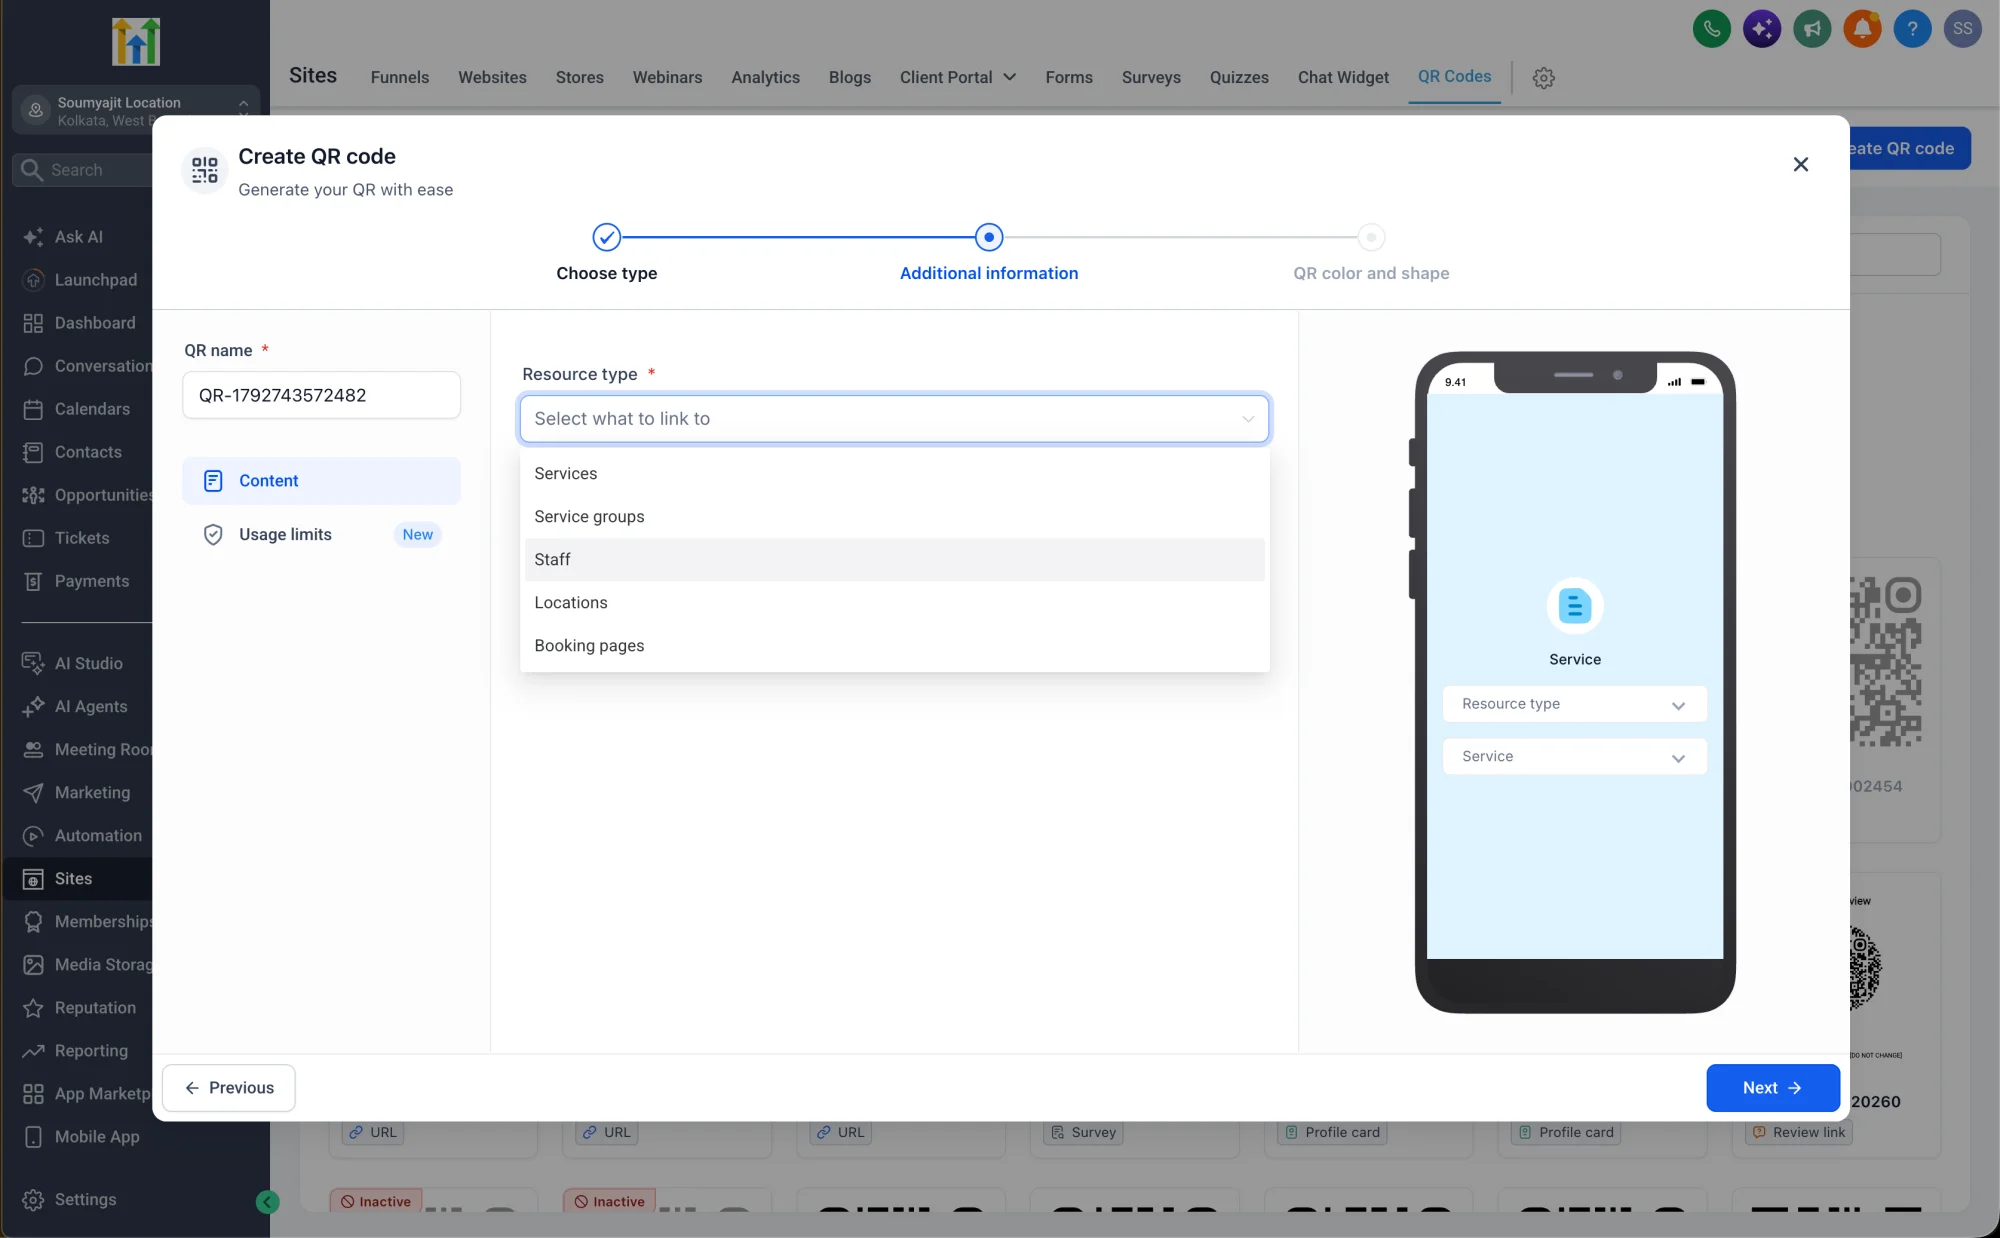
-
Once you finish, click Save to generate a QR code linked to the selected Calendar, Service, or Rental.
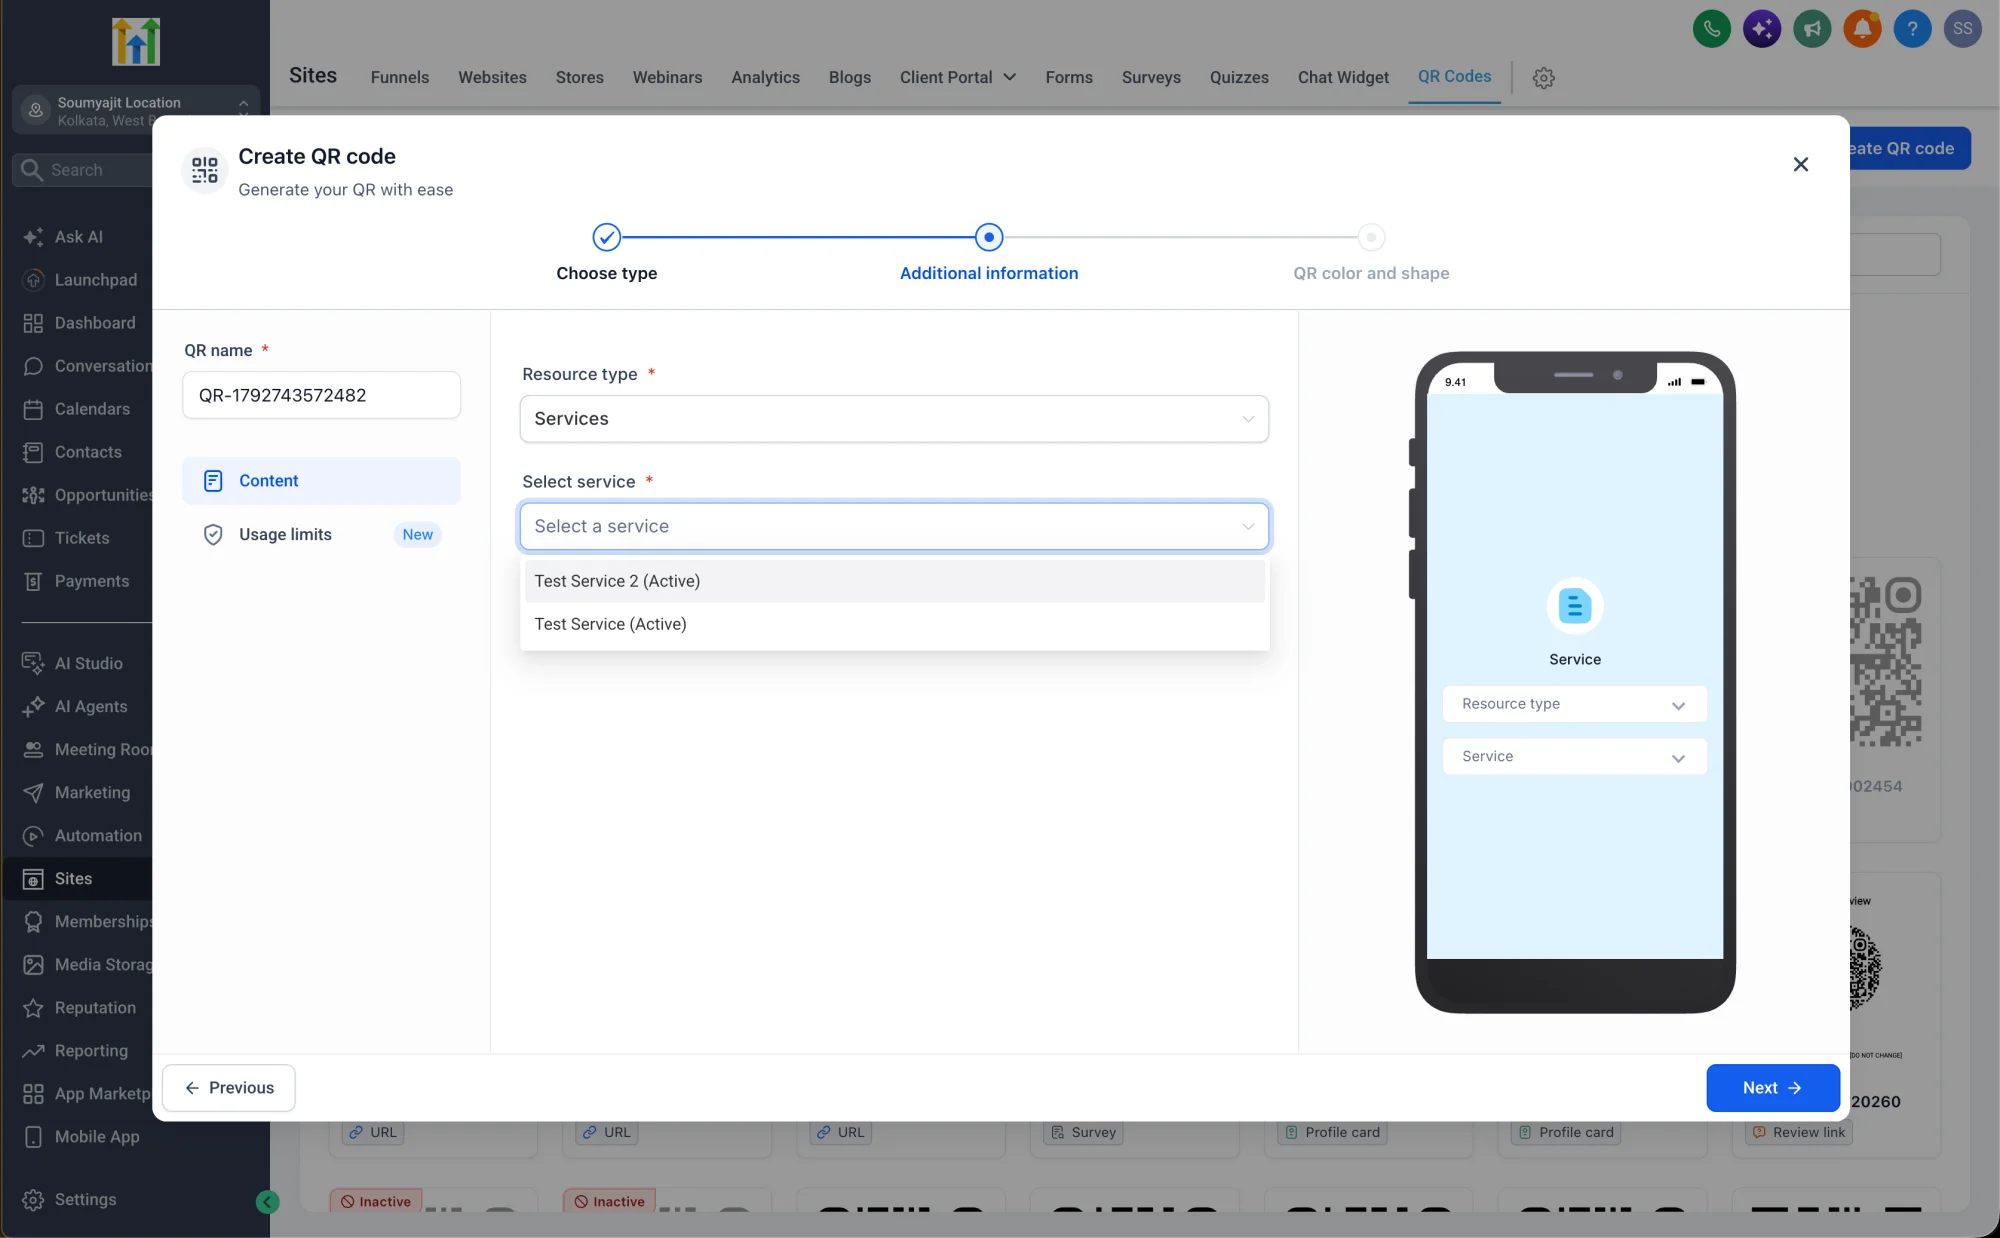
Option 2: Create a QR Code from a Calendar
You can also create a QR code directly from a Calendar, Service Calendar, or Rental Calendar.
- Open the Calendar, Service Calendar, or Rental Calendar and click the three dots on the right-hand side.
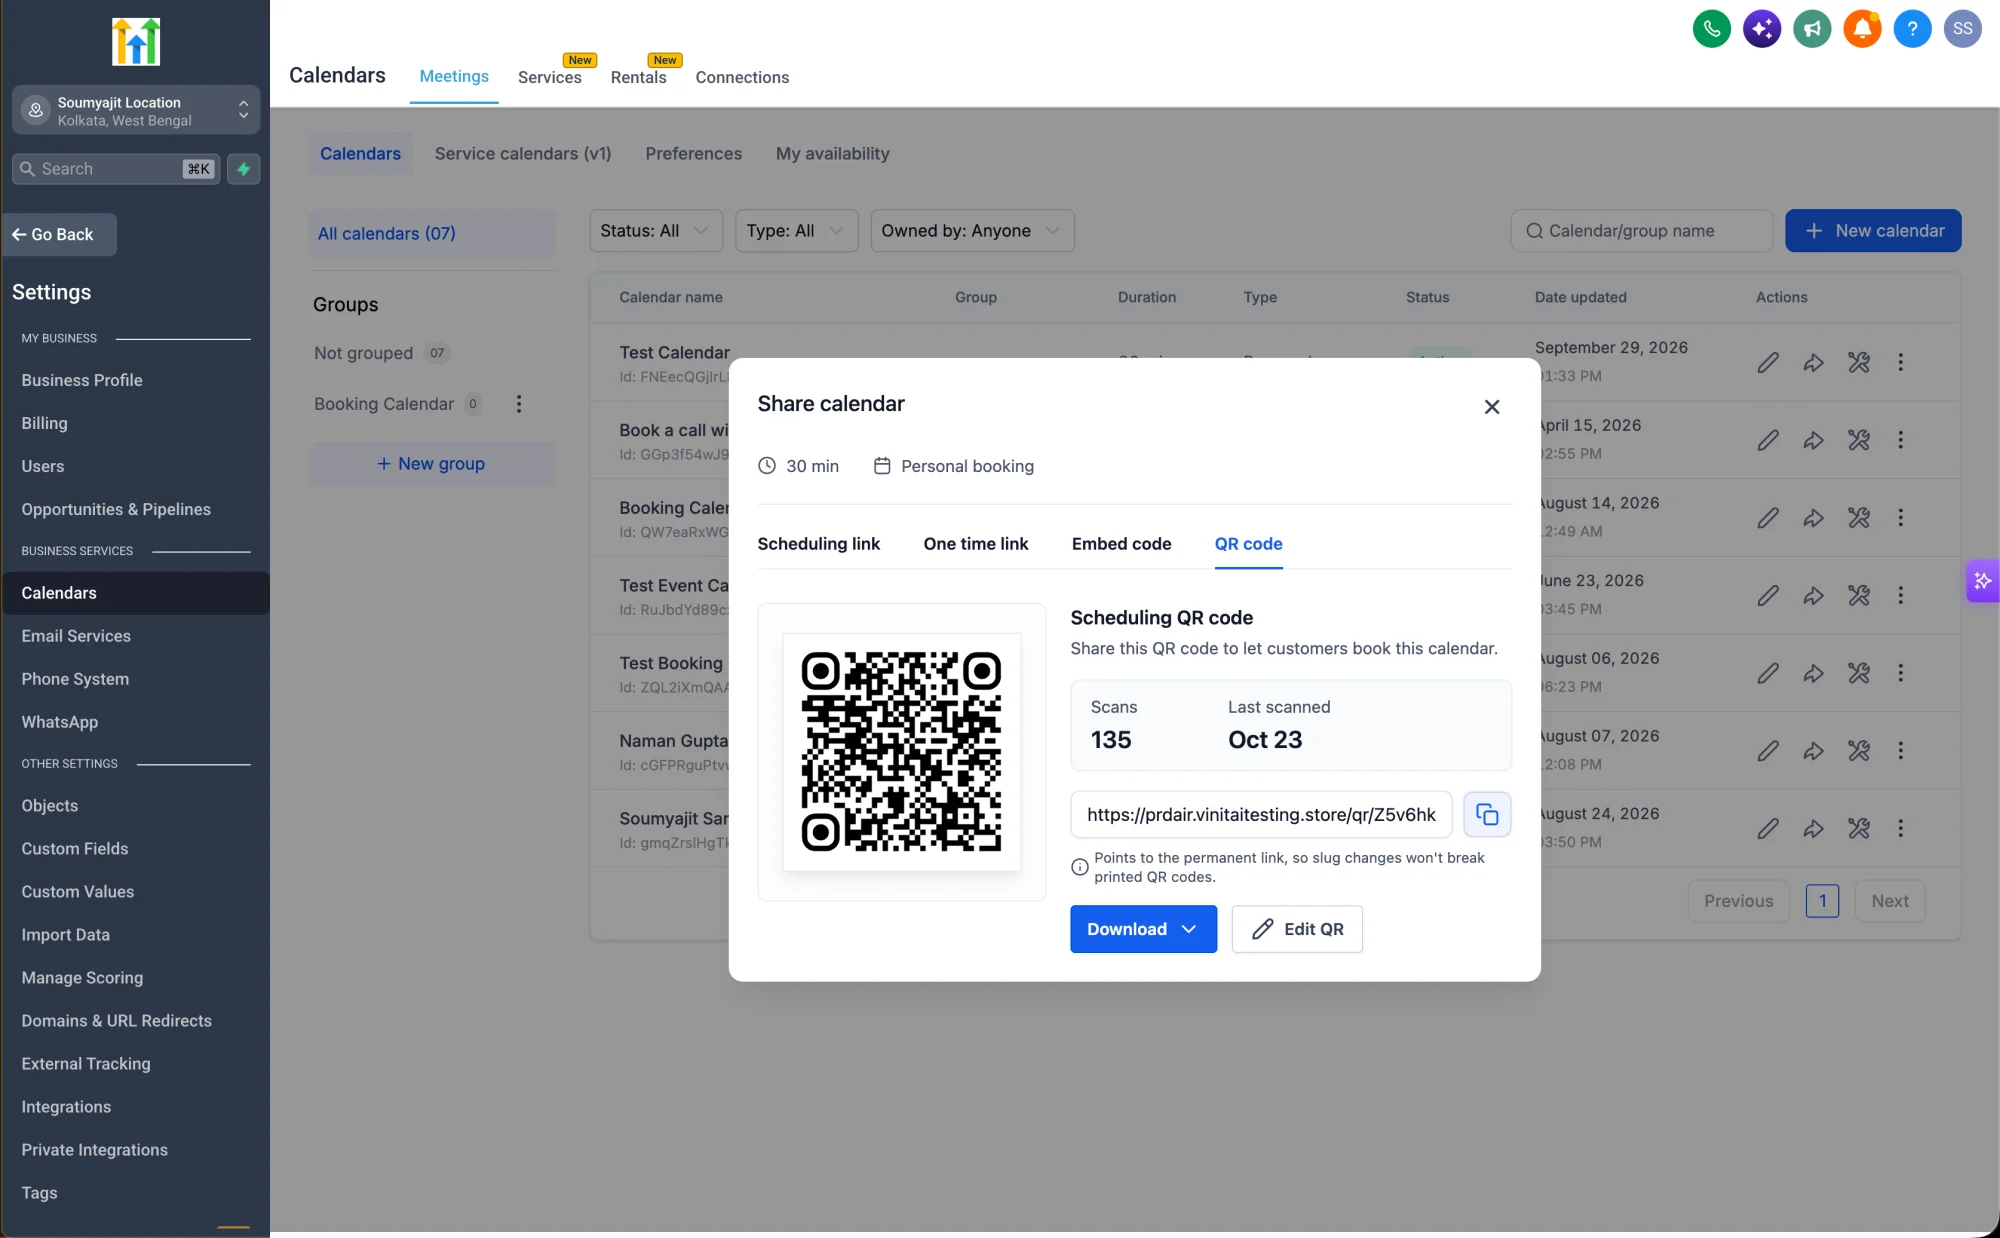 2. Click the Generate QR option.
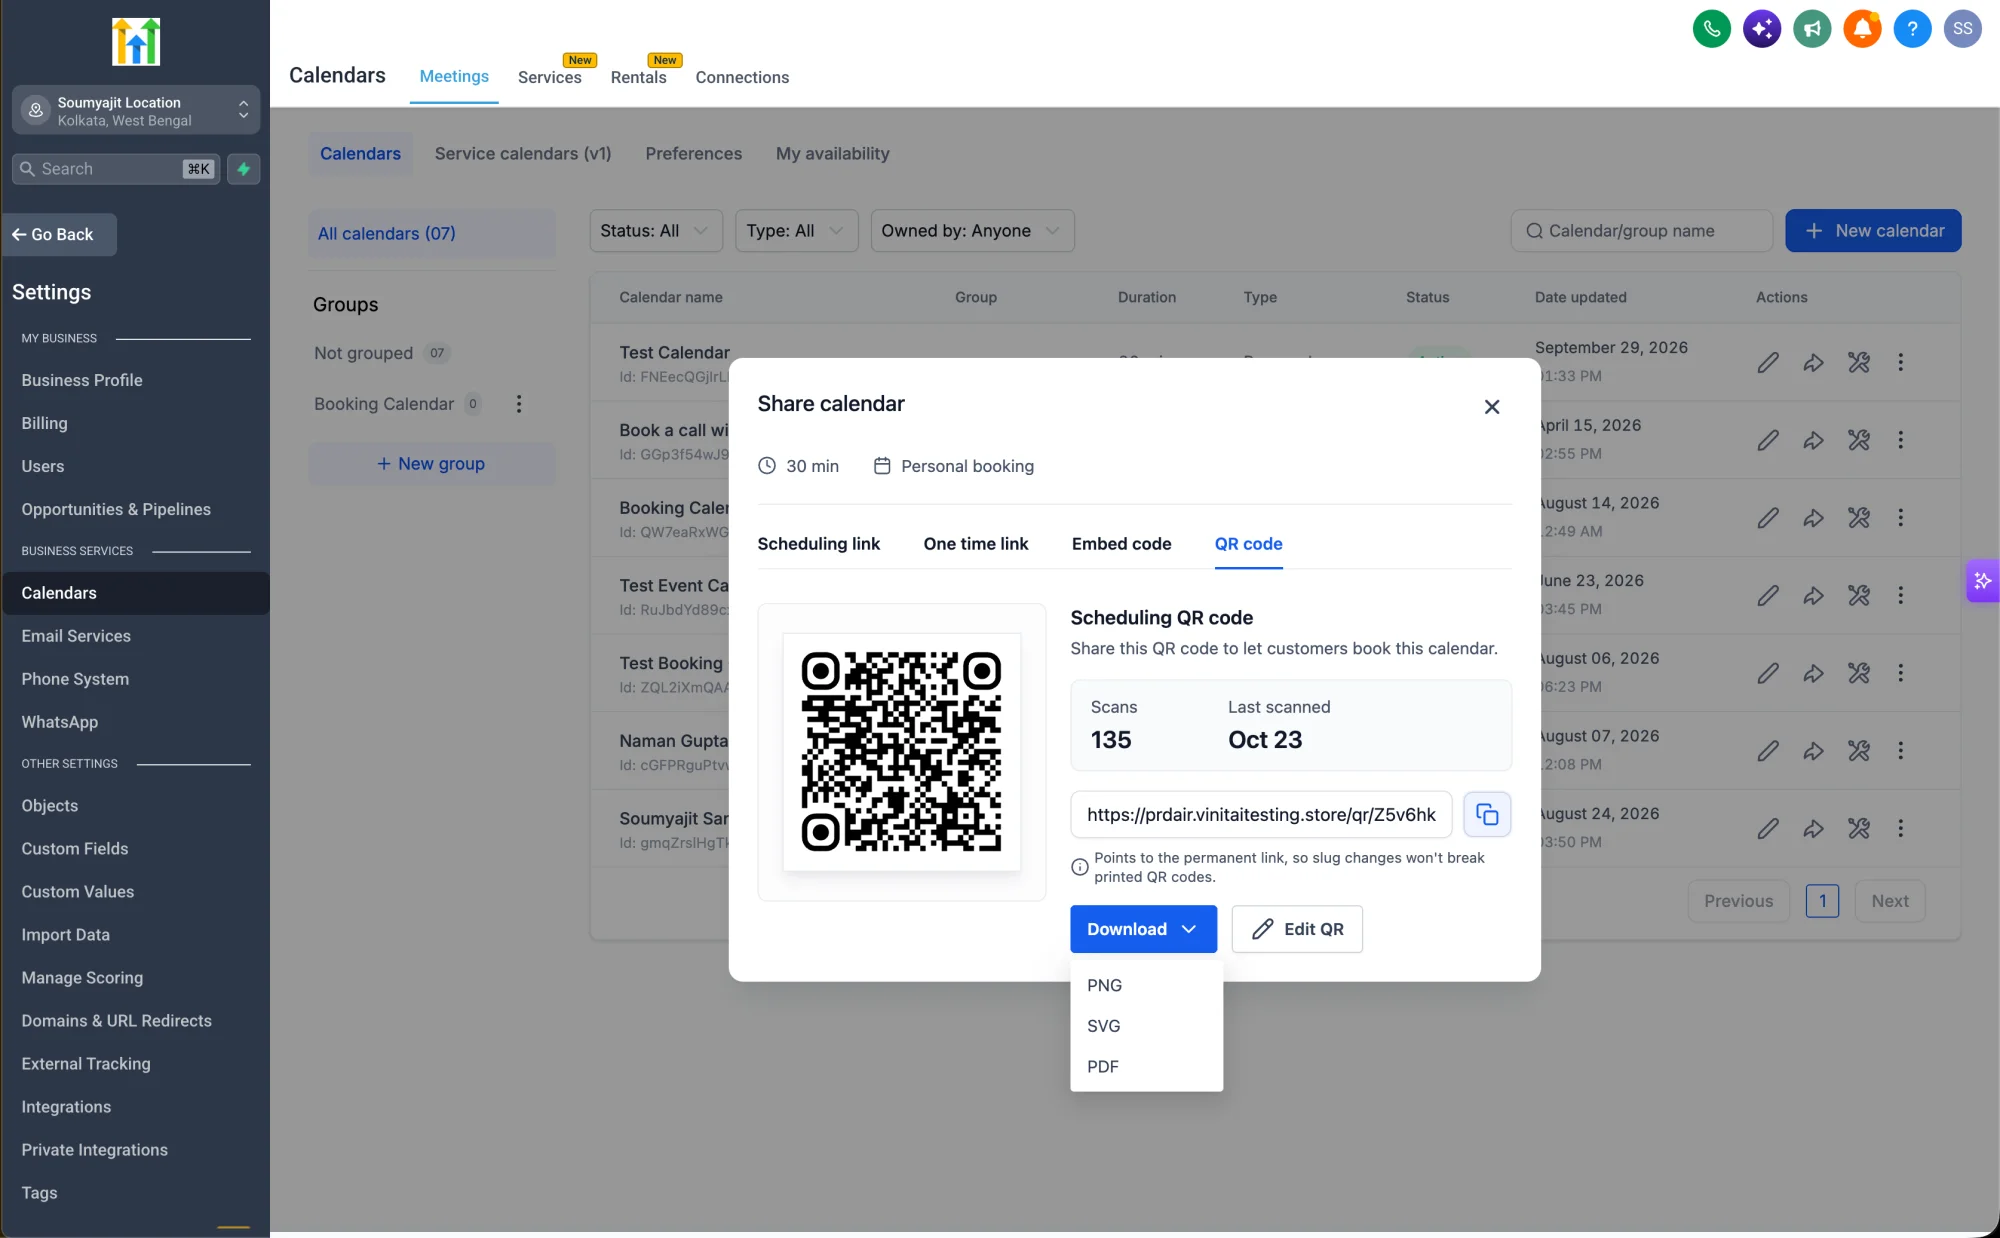 3. In the QR Code field, give your QR code a name and choose the domain in the Domain field.
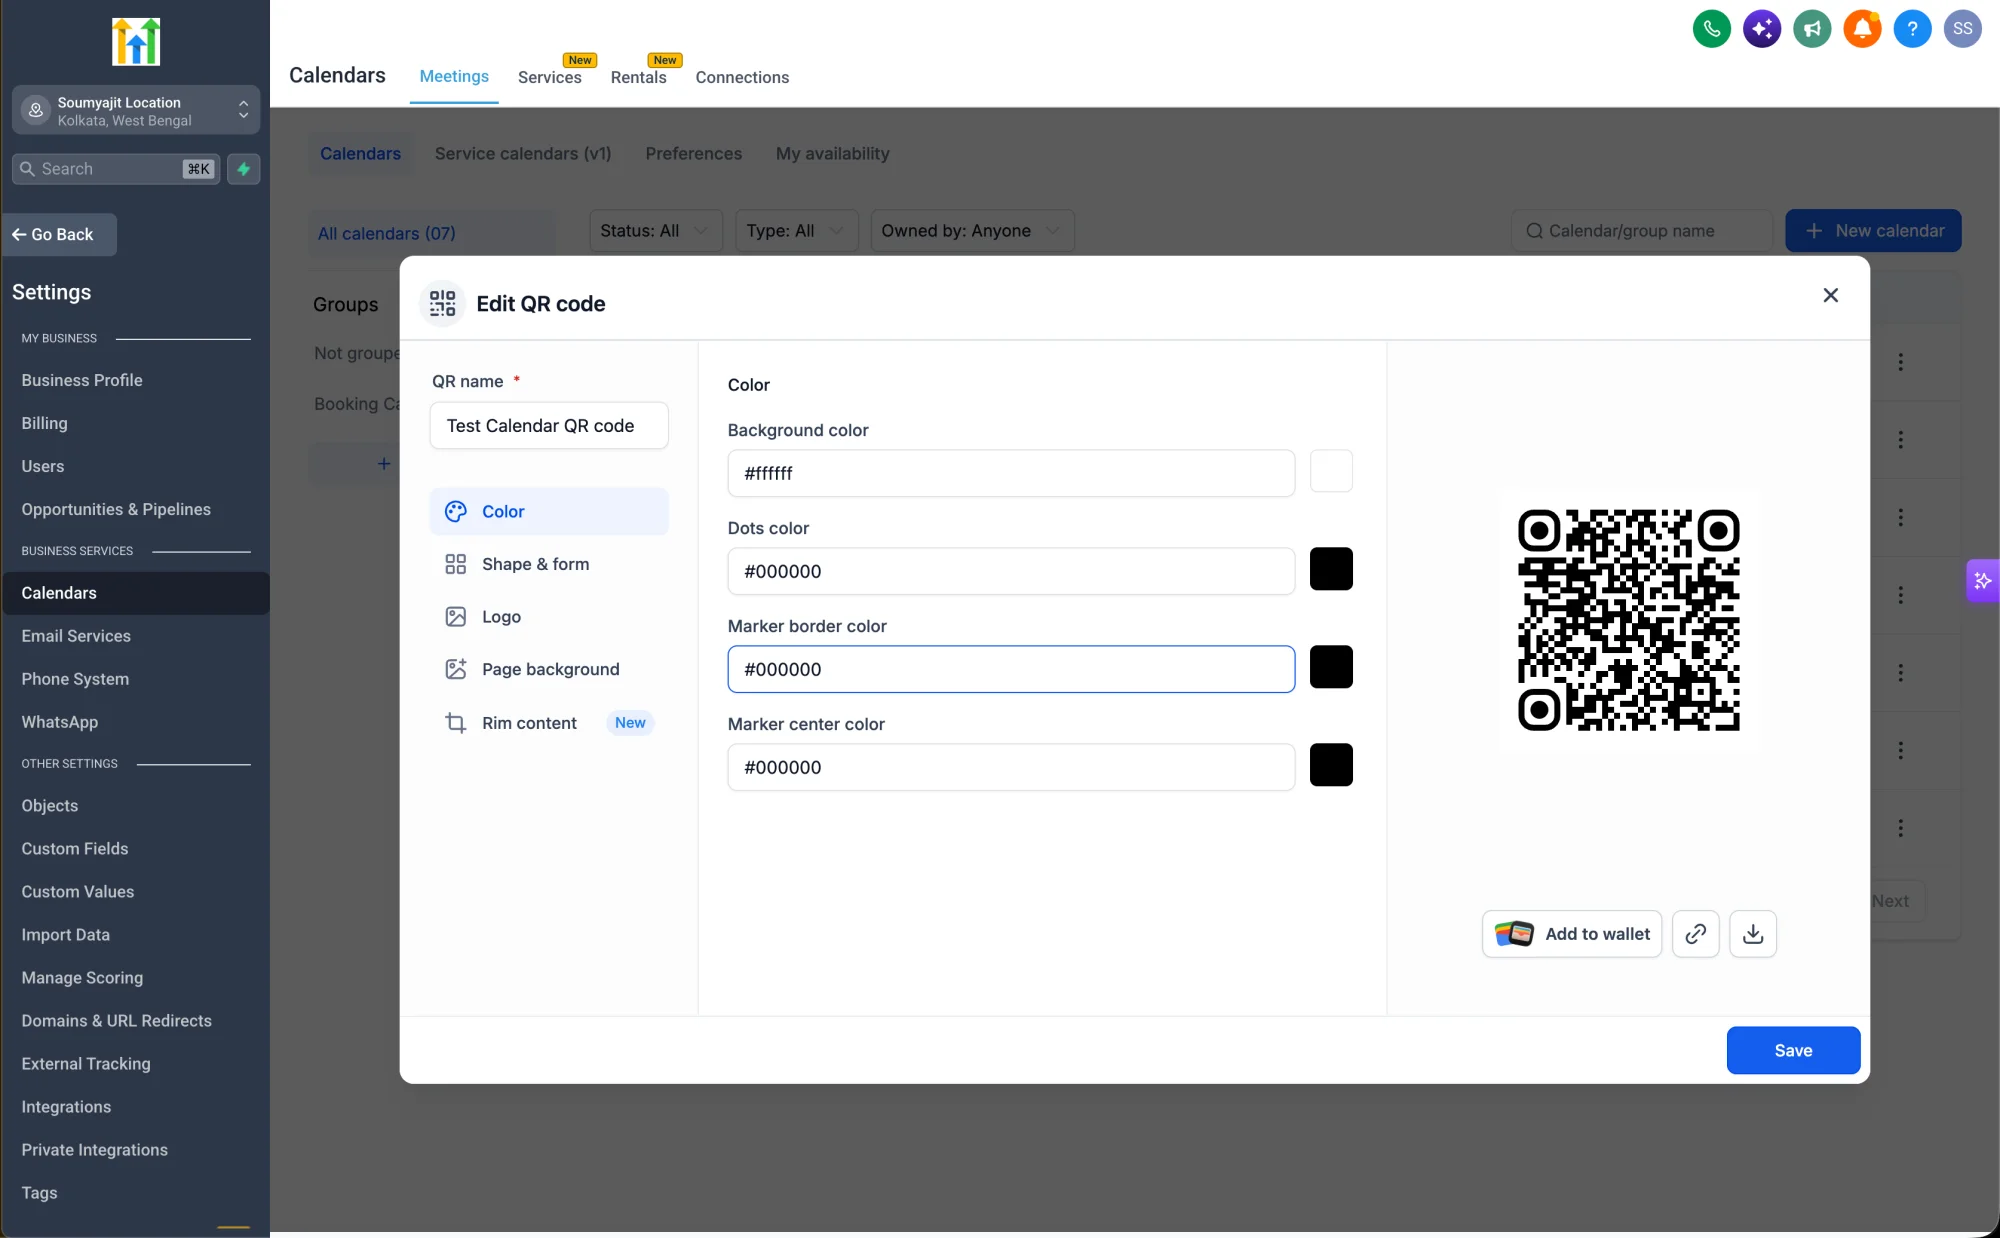 4. Then, choose a Brand Board or a color.
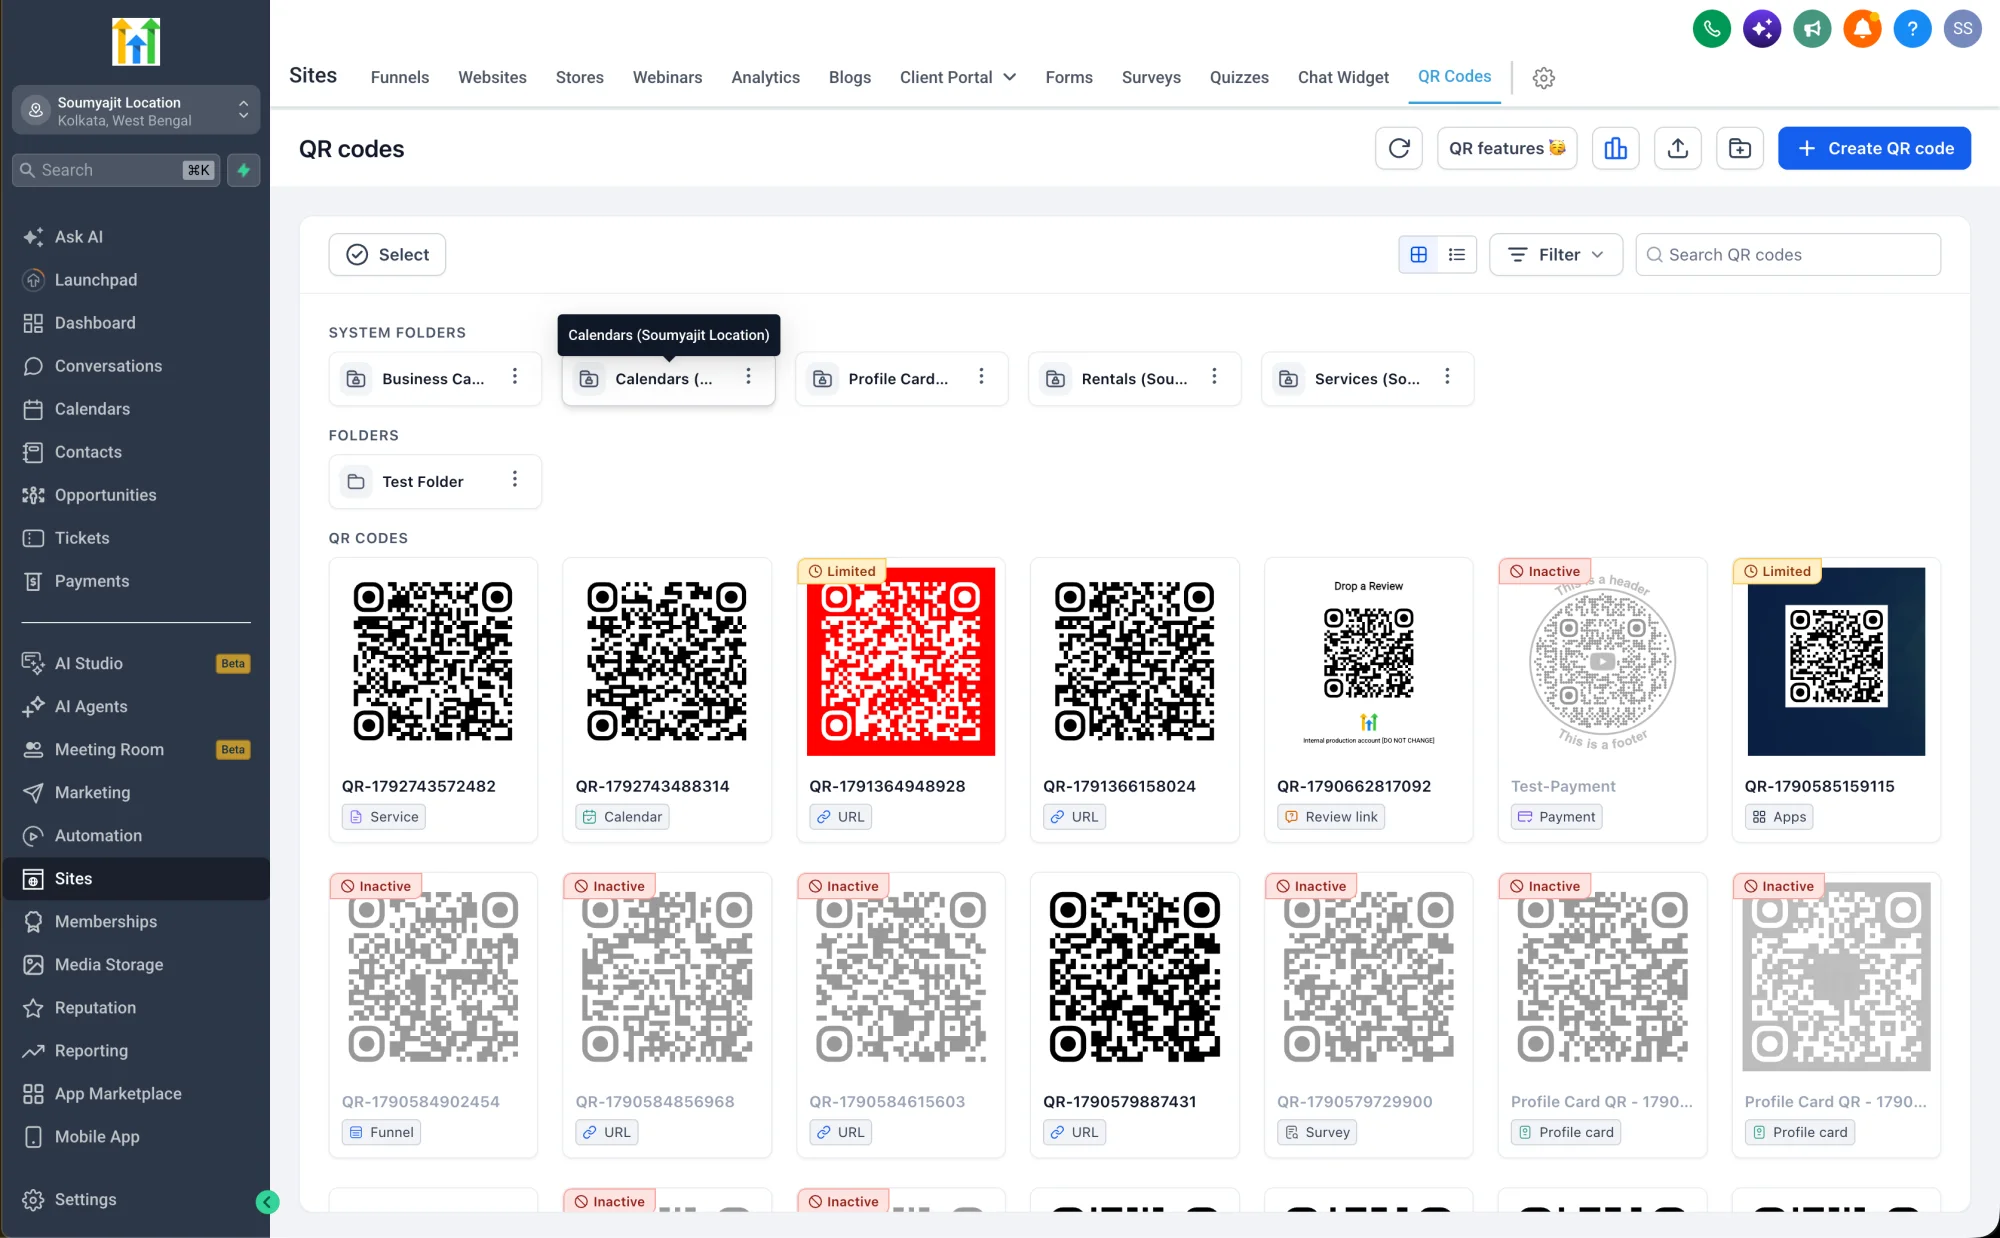 5. Save your QR code.
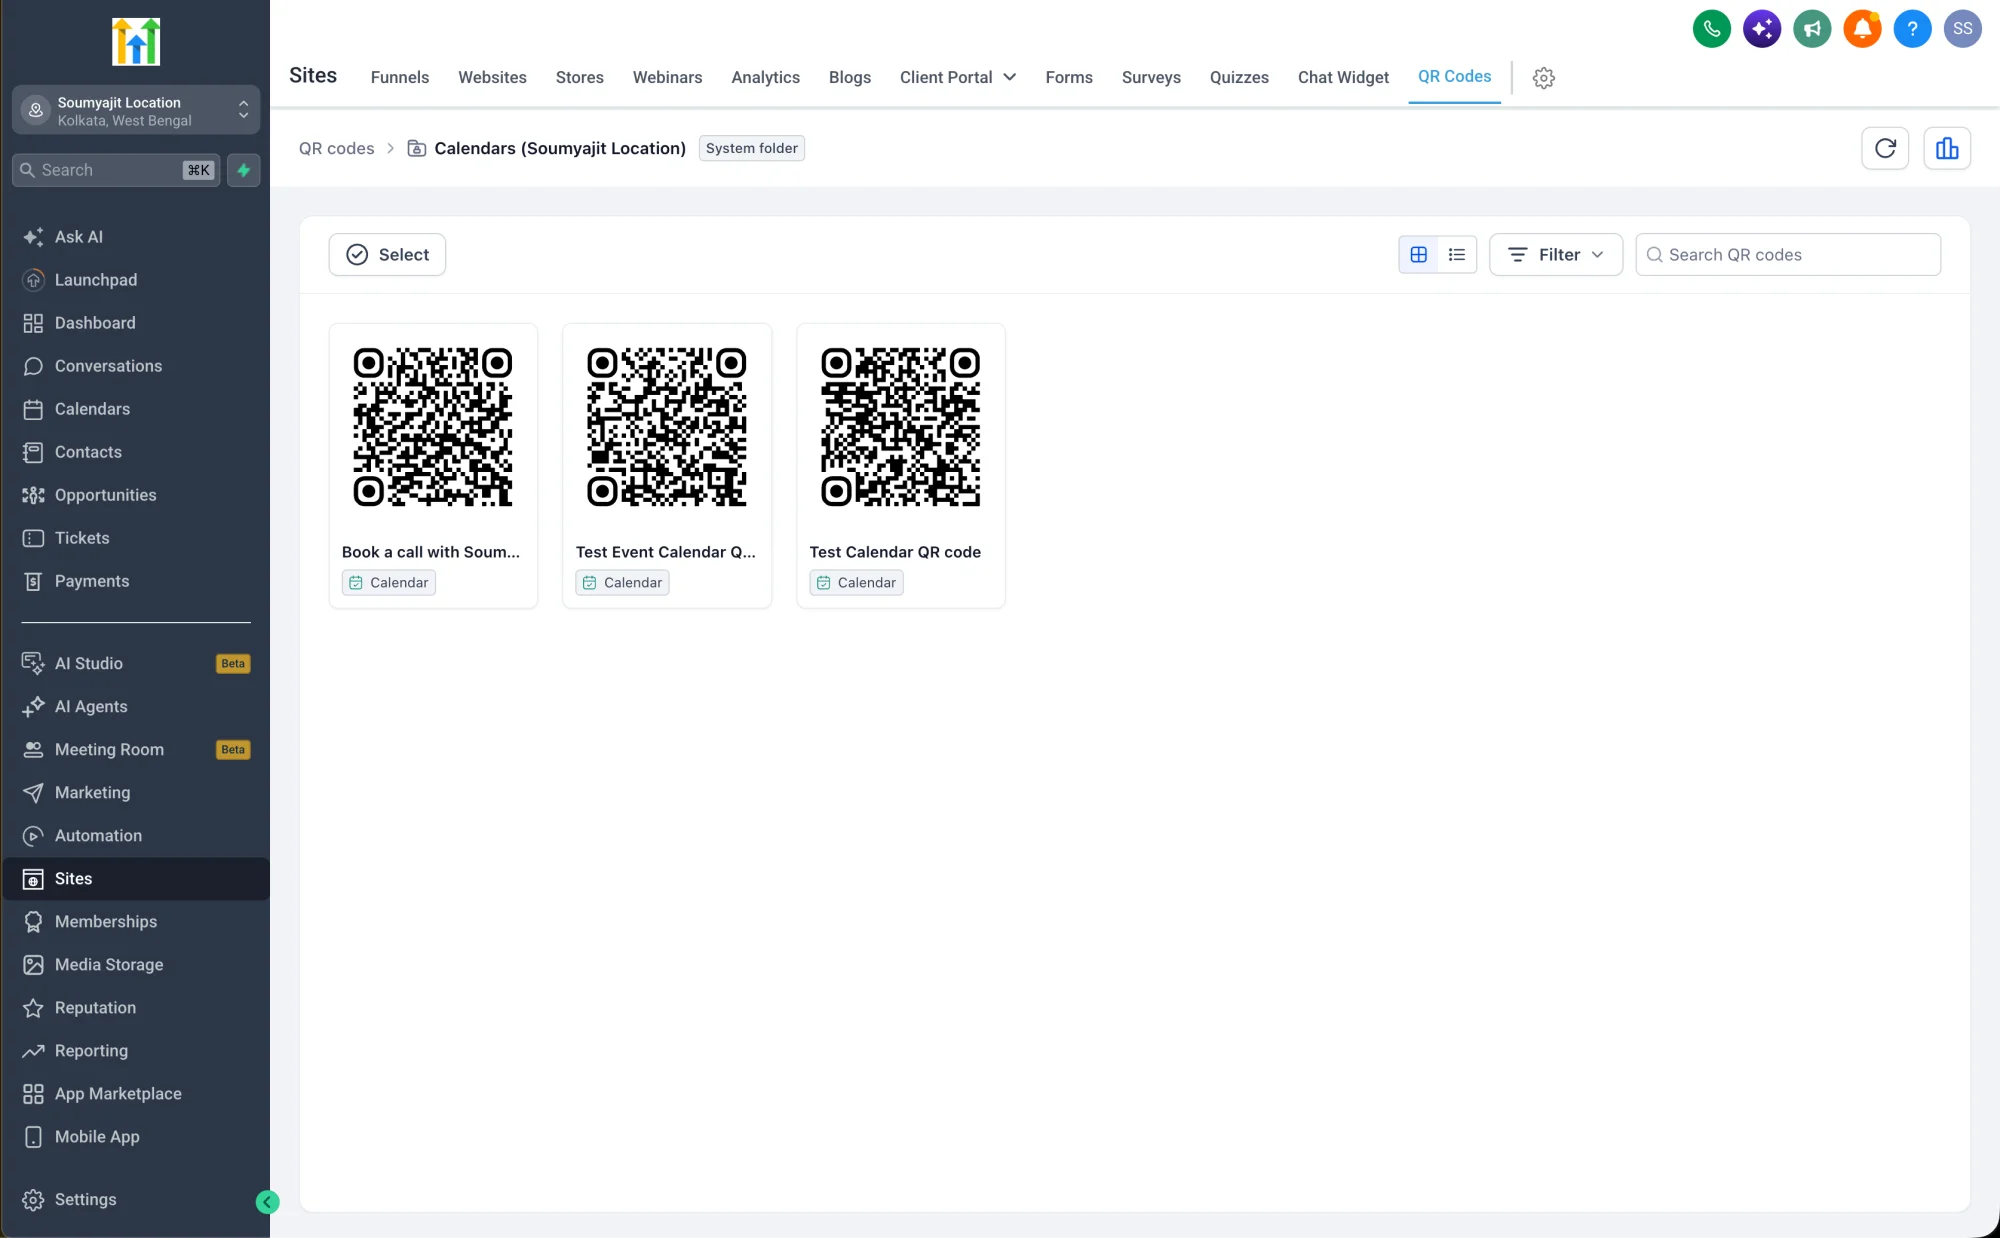
Notes
- Ensure you have access to the QR Codes app and calendars to generate QR codes.
- Existing QR codes linked to calendars will continue to work as expected.
- The QR code name should be unique and descriptive, and you'll need to choose a domain before saving.
- If a calendar is deleted or archived, the associated QR code may no longer work.
- QR codes are dynamic, so if you update your calendar link, the QR code will automatically reflect the updated link.